Everyone loves an awesome lighter—we’ve even seen one antique silver monkey lighter go for $136,000 at auction. Maybe that’s a little excessive, but the point is that creative lighters rock. Why not make one of your very own?
With craft supplies and a bit of creativity (inspired, may we suggest, by your favorite creative strain?), making unique lighters is as easy as it is fun. First, check out our slideshow of DIY lighters below and pick your favorites—then, scroll down to learn how to do it yourself!
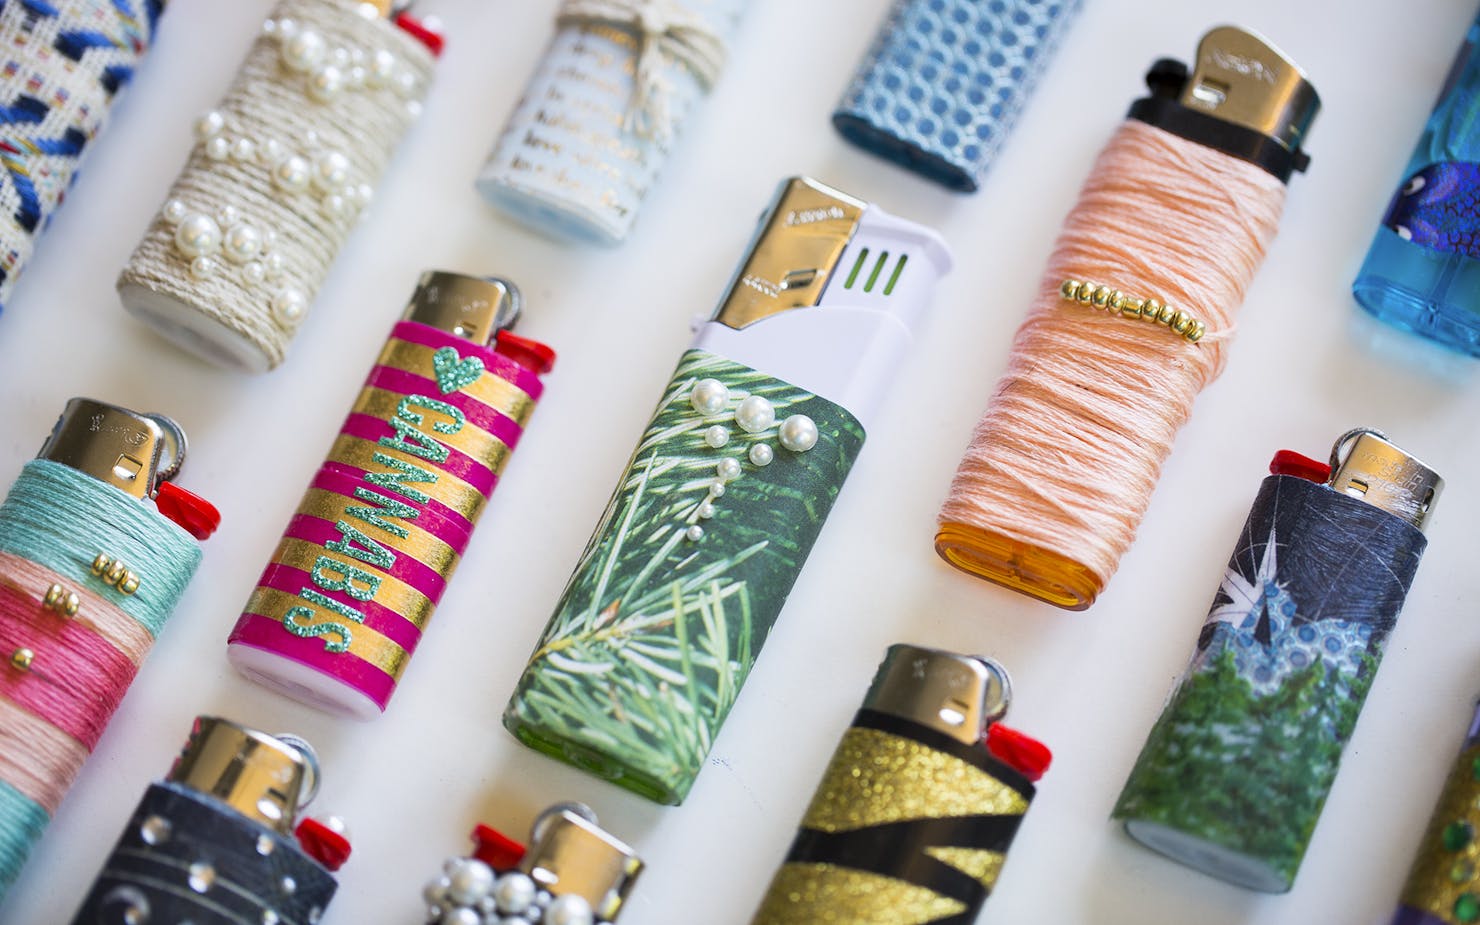
Do-It-Yourself Lighters: What You’ll Need
First, a bit of prep. We all know how easily lighters tend to disappear, so we suggest crafting several lighters in a single sesh to preempt the possibility of someone “accidentally” pocketing your only one. (Pro tip: Keep your friends from stealing your lighters by making extras and giving them out as gifts! These make great stocking stuffers.)

Purchase a variety of lighters ahead of time. (Julia Sumpter / Leafly)
To start, stock up on the lighters themselves—and be sure to get extras in case you make a mistake on one. (Let’s be honest, you can always use more lighters … even if you don’t decorate every last one.) You can find lighters at the front counter of any mini-mart or order a bunch online. We recommend mixing it up with different shapes, sizes, and colors of lighters. Then, head to a craft store for your supplies. Careful not to get too carried away (trust us, this is a real danger).

Lighter craft supplies (Julia Sumpter / Leafly)
Some of the designs below require a bit of waiting for the glue to dry, so we suggest starting with those designs first and filling the time you’re waiting with a few quick-and-easy ones, like the washi tape lighters or the aquarium design.
Patterned Washi Tape Lighter
Time: 3 minutes
Supplies: Washi tape, scissors, letter stickers (optional)

Washi tape lighter supplies (Julia Sumpter / Leafly)
We love washi tape: It makes these cute lighters oh-so-easy to decorate. For the uninitiated, washi tape refers to decorative tape made from natural fibers. The material has its roots in Japan, but has captured the hearts and minds of crafters the world over.
To make these lighters, wrap your washi tape twice around the top section of your lighter, cut the tape at the back of the lighter, wrap twice again right below where the width of your first wrap ends, and continue until you’ve covered the length of the lighter. You can cut the washi tape widthwise on the final wrap if it’s too long as-is.

Patterned Washi Tape Lighter (Julia Sumpter / Leafly)
You can stop here, or add stickers to spell out a word (like we did with “cannabis”) or your name (you’ll never lose your lighter again!).
Pro tip: Washi tape isn’t always the stickiest, so anchor the end of your tape at the back of your lighter with a few dots of glue for added security.

Patterned Washi Tape + Stickers Lighter (Julia Sumpter / Leafly)
Aquarium Sticker + Rhinestone Lighter
Time: 2 minutes
Shop highly rated dispensaries near you
Showing you dispensaries nearSupplies: Stickers, rhinestones

Aquarium lighter supplies (Julia Sumpter / Leafly)
This is another softball in terms of difficulty level: sparkly stickers coupled with sticky rhinestones mean you can finish this one in about two minutes. For our own design, we chose a blue see-through lighter to resemble water, and used fish stickers and a layer of rhinestone “bubbles” to create an aquarium theme.
To make it, space your stickers out around the front, sides, and back of the lighter, and incorporate rhinestones to your heart’s delight. We used a line of light green stones at the top and dark green accent stones betwixt the fish swimming across the lighter’s surface. Et voila! An underwater scene.

Aquarium Sticker + Rhinestone Lighter (Julia Sumpter / Leafly)
Boho Chic Ribbon Lighter
Time: 10 minutes
Supplies: Woven fabric ribbon, scissors, E6000 craft glue

Ribbon lighter supplies (Julia Sumpter / Leafly)
We love the feel and texture that the thick fabric ribbon wrap gives this lighter. You’ll find no shortage of lovely ribbon options available at your craft store.
Begin by measuring the amount of ribbon you’ll need to wrap around the lighter and connect at the back, then count how many widths of ribbon you’ll need to cover the lighter from top to bottom (it’s okay for the ribbon to overlap a bit to fit). Cut that number of ribbon widths to the proper size, then cover the back of each portion with glue. Wrap the portions around the lighter one at a time from top to bottom, holding each portion down for several seconds to ensure a strong bond before letting go. Allow glue to dry completely before handling.

Boho Chic Ribbon Lighter (Julia Sumpter / Leafly)
Beaded Hemp Lighter
Time: 15 minutes
Supplies: Hemp cord, pearl stickers (small beads also work), E6000 glue

Hemp lighter supplies (Julia Sumpter / Leafly)
We love any cannabis lighter that incorporates hemp into its design, as this one does. To start, squeeze a line of glue up the back of your lighter, attaching the end of the hemp cord to the glue and letting dry for a few minutes. Wrap the hemp around the lighter from top to bottom until lighter is covered. Add pearl stickers, or glue bead accents on top of the hemp. Let dry completely before handling.
Pro tip: Use a thin line of glue around the top and the bottom of the lighter to anchor the hemp cord and keep it from sliding off the lighter.

Beaded Hemp Lighter (Julia Sumpter / Leafly)
Beaded Embroidery Floss Lighter
Time: 25 minutes
Supplies: Embroidery floss in colors of your choice, beads, E6000 glue

Embroidery floss lighter supplies (Julia Sumpter / Leafly)
This lighter is reminiscent of a colorful hair wrap. It looks great, feels great in the palm of your hand, and sparkles with the addition of beads to the design.
To start, squeeze a line of glue up the back of your lighter, and let dry for a minute so it becomes tacky. Hold the ends of your embroidery floss color or colors together and attach them to the glue line. Let dry. Add a thin line of glue around the top edge of your lighter body. Choose which color of floss you want to appear first; bend the other threads down the back of the lighter so they line up next to the glued portion and will be covered by the first color as you wrap.
Begin wrapping your first color around your lighter, anchoring it at the top with the glue line and continuing to align each wrapped strand with the strand above (for a polished look). Add beads to the strand as desired as you wrap (you can also replace the beads with dangly charms for a more whimsical design).

Embroidery Floss Lighter With Gold Bead Details (Julia Sumpter / Leafly)
When you’re ready to switch colors, select your next strand and begin wrapping below the original color, covering the other strands as you go. Continue alternating colors and adding beads until you reach the bottom of the lighter. Anchor the thread with another line of glue to ensure that your thread won’t slide off the lighter and unravel. Cut and anchor the thread at the back of the lighter with a final bit of glue.
Pro tip: For a faster, less polished look, simply wrap a thread or threads around at random until all sections of the lighter are covered. You can still add beads and charms as you like.

Beaded Embroidery Floss Lighter #2 (Julia Sumpter / Leafly)
Evergreen Trees Lighter
Time: 10 minutes
Supplies: Scrapbooking paper, E6000 glue, sticker accents (optional)

Evergreen lighter supplies (Julia Sumpter / Leafly)
This lighter gives new meaning to the phrase “smoke trees.” To make it, cut evergreen tree-themed scrapbook paper to fit once around your lighter body. Cover lighter with glue, glue paper to lighter, and hold tightly for a minute or longer until paper is securely attached to the lighter body. Once dry, finish with stickers or accents of your choice.
Pro tip: For a more durable design, coat finished product with Mod Podge.

Evergreen Trees Lighter (Julia Sumpter / Leafly)
Translucent Craft Paper Lighter
Time: 10 minutes
Supplies: Translucent scrapbooking paper, E6000 glue, hemp cord or Mod Podge (optional)

Translucent craft paper lighter supplies (Julia Sumpter / Leafly)
When working with translucent paper, a bit of the underlying lighter’s color will show through, so pick a lighter color you like (we used light blue).
Cut a strip of translucent paper long enough to wrap twice around the lighter body. Cover the back of the lighter with glue, stick the paper to the lighter, wrap the paper twice around the body of the lighter, and anchor again at the back with plenty of glue. If your paper is stiff and isn’t staying put, use hemp cord to tie it down.
Pro tip: Translucent papers can be tricky to work with, resisting containment by the glue—thus, these lighters work best set out on your coffee table, rather than getting battered and bent in your bag. If you’d like to take this lighter on the go, try coating the paper with Mod Podge to anchor the paper.

Translucent Craft Paper Lighter (Julia Sumpter / Leafly)
Statement Glass Bead Lighter
Time: 30 minutes
Supplies: Large glass beads, small accent beads, E6000 glue

Glass bead lighter supplies (Julia Sumpter / Leafly)
The array of looks you can create with beads is virtually endless, and with the right beads, this lighter comes out looking bold and feeling satisfyingly solid in your palm. To make it, use plenty of E6000 to glue your statement beads to the front and back of the lighter. Once the large beads have dried, cover the rest of the lighter with plenty of smaller beads (you’ll need to work with one side at a time and let the beads dry before moving on to the next side). Let lighter dry completely before handling.
Pro tip: To ensure the statement beads stay put, choose flat beads and glue them to a flat lighter.

Statement Glass Bead Lighter (Julia Sumpter / Leafly)
Black-and-White Pearl Necklace Lighter
Time: 3 minutes
Supplies: Pearl stickers in multiple sizes
We love the way this classy lighter looks like it’s wearing a collar of bubbles. To make it, take your sticky flat-backed pearls and cluster them all the way around the neck of your lighter, interspersing pearls of different sizes to create a lovely necklace.
Pro tip: This design stands out best on black, but you can use any color you like.

Black-and-White Pearl Necklace Lighter (Julia Sumpter / Leafly)
Glittery Geometric Lighter
Time: 5 minutes
Supplies: Duck Tape Single Sheets, scissors, rhinestones (optional)

Glittery Geometric Lighter (Julia Sumpter / Leafly)
Did you know that the Duck Tape brand also makes a sticky decorative paper? Neither did we, until we perused the craft store.
This clever supply makes it easy to create geometric designs of all kinds on your lighter—simply slice and stick to your heart’s content! As with the pearl lighter, black will show your design off best, but any color will work. If you like, add rhinestone stickers to create a carnival-ready look.

Glittery Geometric Lighter With Rhinestone Accents (Julia Sumpter / Leafly)
Mod Podge Collage Lighter
Time: 25 minutes
Supplies: Scrapbook paper, stickers, rhinestone or pearl accents, Mod Podge

Mod Podge Collage Lighter (Julia Sumpter / Leafly)
This lighter concept leaves plenty of room for creativity—most scrapbooking supplies will work as potential decorations here. For ours, we used scrapbook paper featuring constellations as a base, stickers and stones as accents, and Mod Podge to provide a secure, shimmery, and textured top coat.
To start, cut your scrapbooking paper to fit your lighter, and glue securely. Let dry. Next, add your accents. For our first lighter, we upped the glitz of the constellation design by adding rhinestones and pearls atop the paper’s stars. For our second, we overlaid the night sky background with a line of sticker trees to create a forest-scape, then pasted words cut from another sheet of scrapbooking paper on top of the trees. To finish, we coated both lighters thoroughly in Mod Podge to preserve their designs.

Mod Podge Constellation Collage Lighter (Julia Sumpter / Leafly)
Ready to share your own lighter creations? Post a picture in the comments so everyone can admire your handiwork!


